Production Data Export |
The Production Data Export is the center place for operational management to export at a customized detail level (per call) or summarize the production data to be sent out for further analysis. Parameter sets will be user and company specific. Users can setup multiple parameter sets for different exporting purposes. Production Data Export allows a user to setup scheduled jobs to automatically send an export file to a directory and email recipient. Parameter Sets can be added, shared, modified, deleted, customized, run and exported directly from Production Data Export. Logged Activities, View Schedule Report and View History Report are available to review the status of scheduled production data export jobs.
|
Navigate To: Routing>Production Data Export |
Production Data Export Parameters will default to Show Parameters but allow the user to Hide Parameters by clicking on the
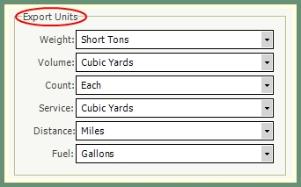
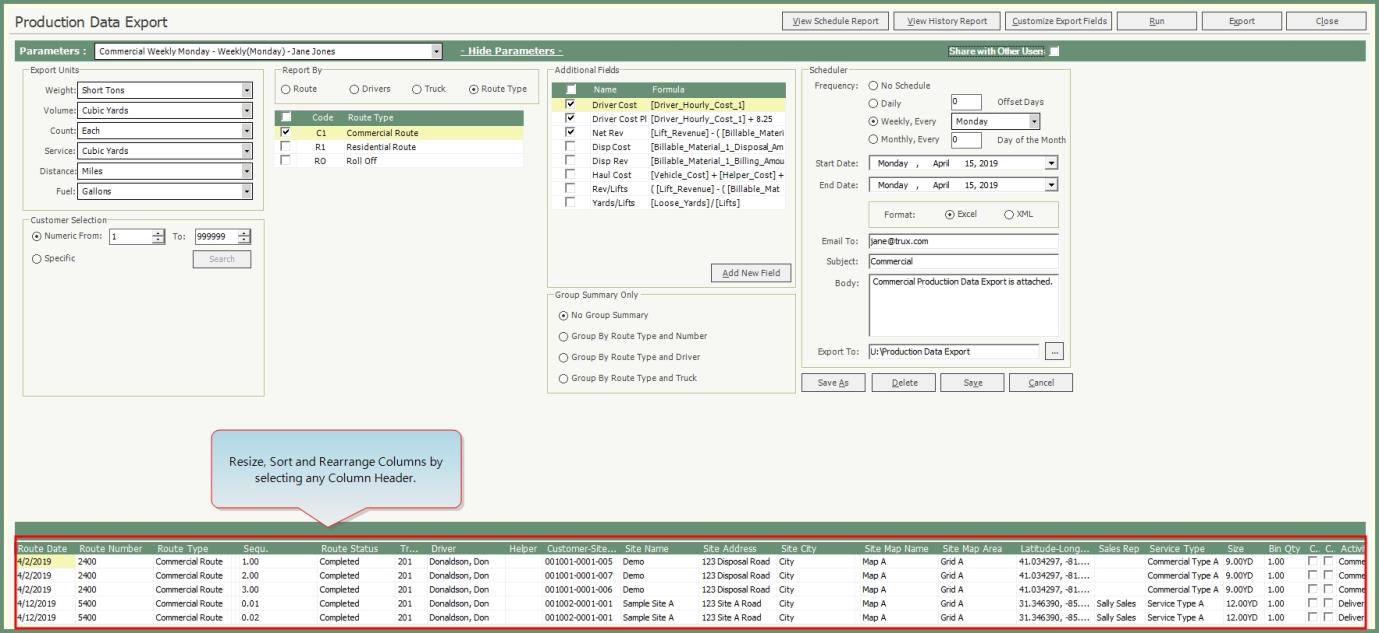
- : Select the units of measure to be exported as. These selections allow all of the values to convert to the same unit of measure for simpler comparison and consolidation.
- : Export by customer range or specific customer. Search button can be used to open Quick Search to select specific customer(s).
- Report By: Select to Export by Route, Driver, Truck or Route Type. Select all or specified criteria from the associated grid.
- Additional Fields: Select additional fields to export beyond the already included base fields.
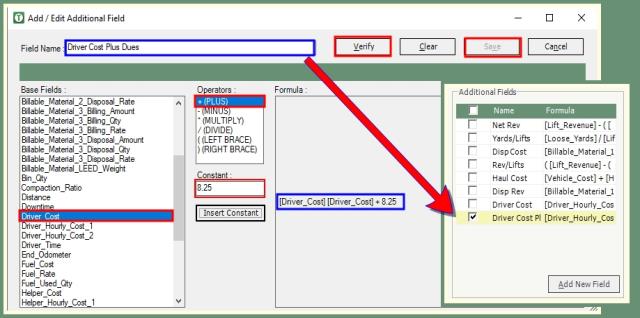
- Add New Field: Create a new field or Customize an existing base field by defining a unique .
- Group Summary Only: Production can be exported by default in detail (No Group Summary) or by one of the available three group options.
- Group By Route Type and Number.
- Group By Route Type and Driver.
- Group By Route Type and Truck.
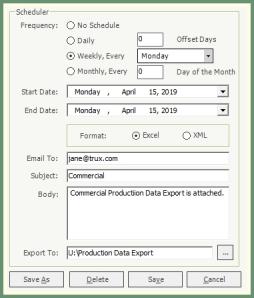
- : Schedule a production data export job to be run in the background by a specified frequency, format, email recipient and export location.
- Frequency: The job schedule can be defined as one of the below options.
- No Schedule: User runs the production export on an as needed basis.
- Daily: Export runs daily for a single day at a time with the option to define .
- Weekly, Every: Select Day of the Week and the export will run for a week starting with the day selected .
- Monthly, Every: Specify the Day of the Month. The export will run on this day of the month every month.
- Start & End Date: Will indicate when the job will be started and when the job will be ended. (Results are based upon Route Dates).
- Format: Select the export format option of Excel or XML. Excel will be used for human reading or to do further grouping/sorting. XML is mainly used for a third-party program.
- Email To: The email addresses of the production data recipients.
- Subject: Email Subject content.
- Body: Message to recipient in the body of the email. Additional email body content will include which routes in the date range have not been completed.
- Export To: The location the exported data in the selected format will be delivered to. Manually enter or click the browser button to navigate to the export folder location.
- Exported File Name/Attachment=Parameter Set Name + Date-Time Stamp.
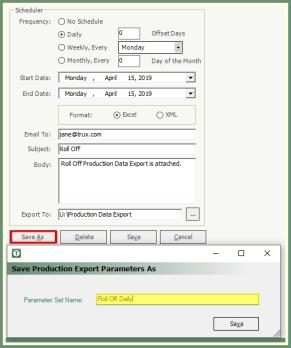
- Save As: . Saved Parameters will be added to the
- Delete: Will delete the current parameter set.
- Save: Will update the current parameter set.
- Cancel: Will cancel the current parameter changes and restore to the original.
- : Will allow this parameter set to be available to all users with access to Production Data Export.
- When Share with Other Users is selected, other users have the ability to run, export, modify and delete the shared Parameter Set.
- When Share with Other Users is not selected, only the user that created the Parameter Set will have access to run, export, modify and delete the Parameter Set.
Define Production Data Export Parameters based on specified unit of measure, customers, route, fields and scheduled frequency, format and email recipient.
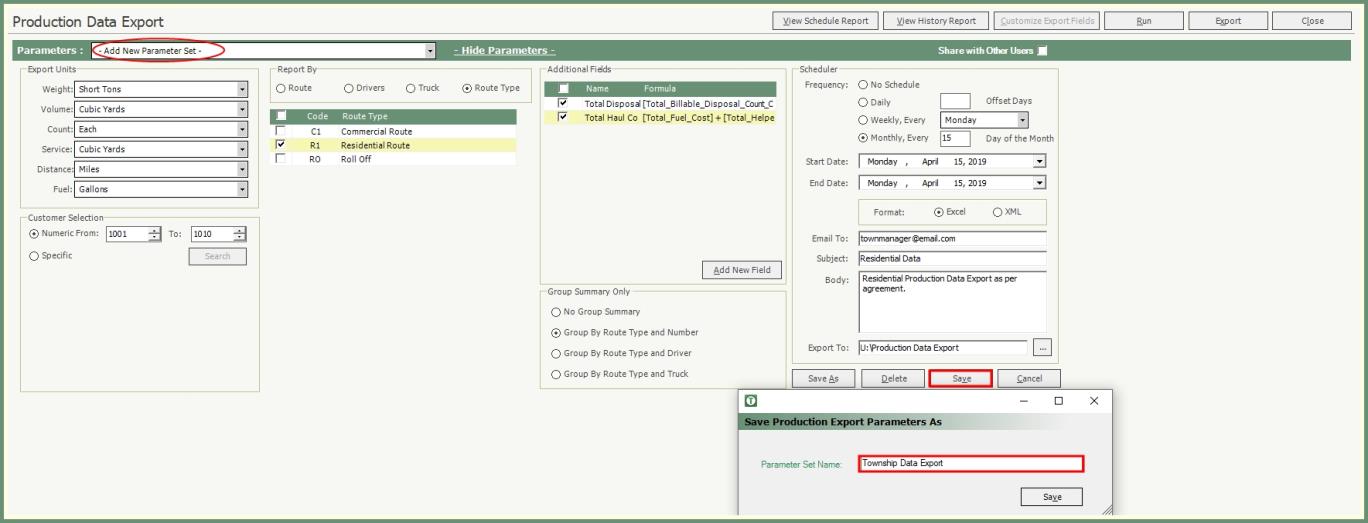
- Add New Parameter Set will be the default in the Parameters drop down or select Add New Parameter Set from the drop down.
- Define Parameters applicable to this Production Data Export.
- Export Units. Use defaults or specify units by unit of measure drop downs.
- Customer Selection. Use default as all 1 to 999999, specify customer number from and customer to, or select Specific and enter or search for customers to add to the grid.
- Report By. Select Route, Drivers, Truck or Route Type. Grid selections will change per selection. Select all or specific type from the displayed grid.
- Additional Fields. Fields available per the Report By selection. Select optional additional fields from grid.
- Add New Fields to define additional fields not available from the base fields.
- Group Summary. Select No Group Summary for Detail or Group by route type and number, route type and driver, or route type and truck.
- Scheduler. Define Schedule Parameters by frequency, start/end date, format, email and export location.
- Click Save. Enter Parameter Set Name and save.
- New Parameter will be added to the parameter drop down as Parameter Name+Frequency+User.
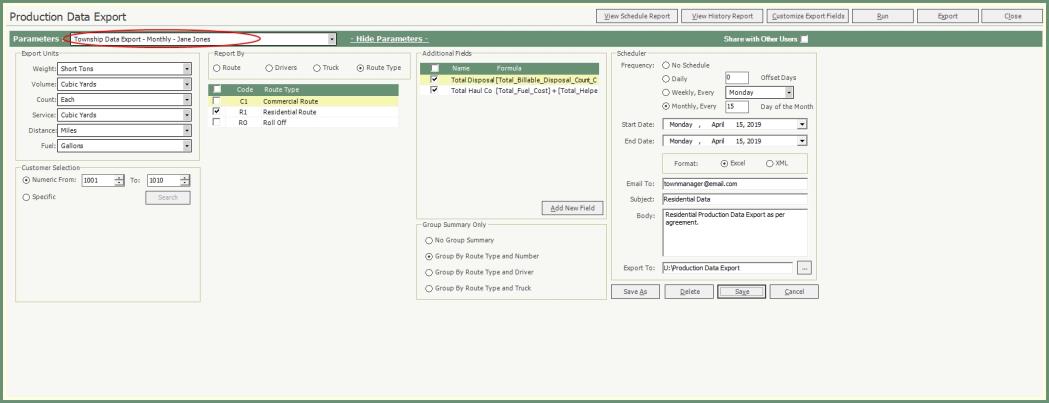
Parameter Sets can be modified as an existing set or modified and saved as a new parameter set.
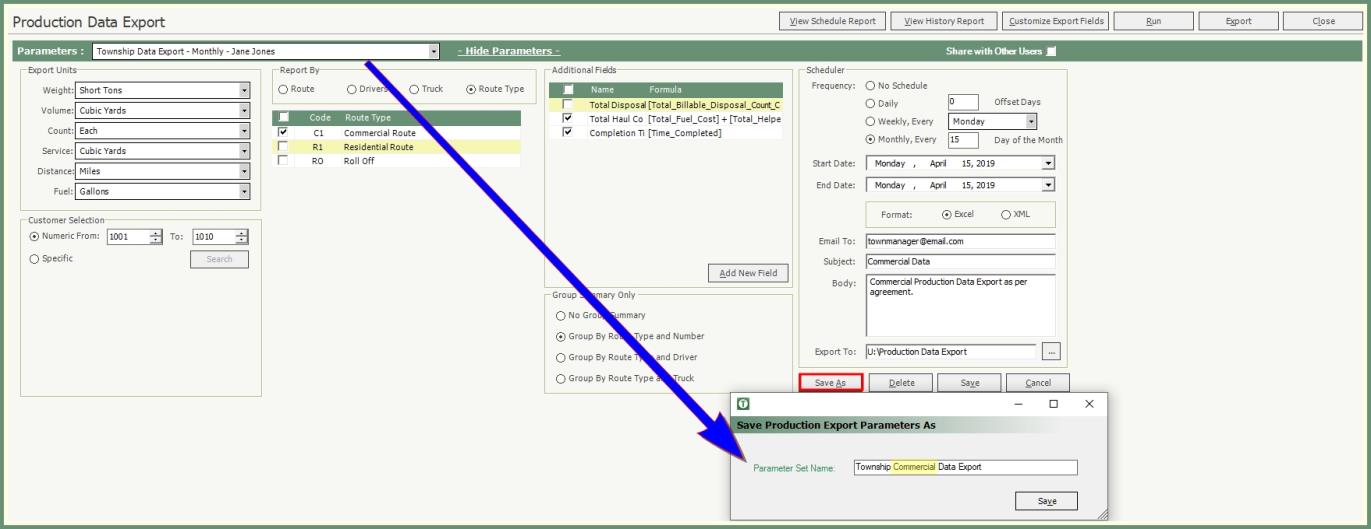
- Recall an existing Parameter from the drop down.
- Add/Modify parameter fields.
- Modify or Review Scheduler, Start/End Date, Format, Email and Export location.
- Save or Save As.
- If saving as the Same Parameter Set, click Save.
- If saving as a New Parameter Set, click Save As, enter a unique Parameter Set Name and Click Save.
- New Parameter Set will be added to the parameter drop down as
Parameter Sets can be permanently deleted as needed.
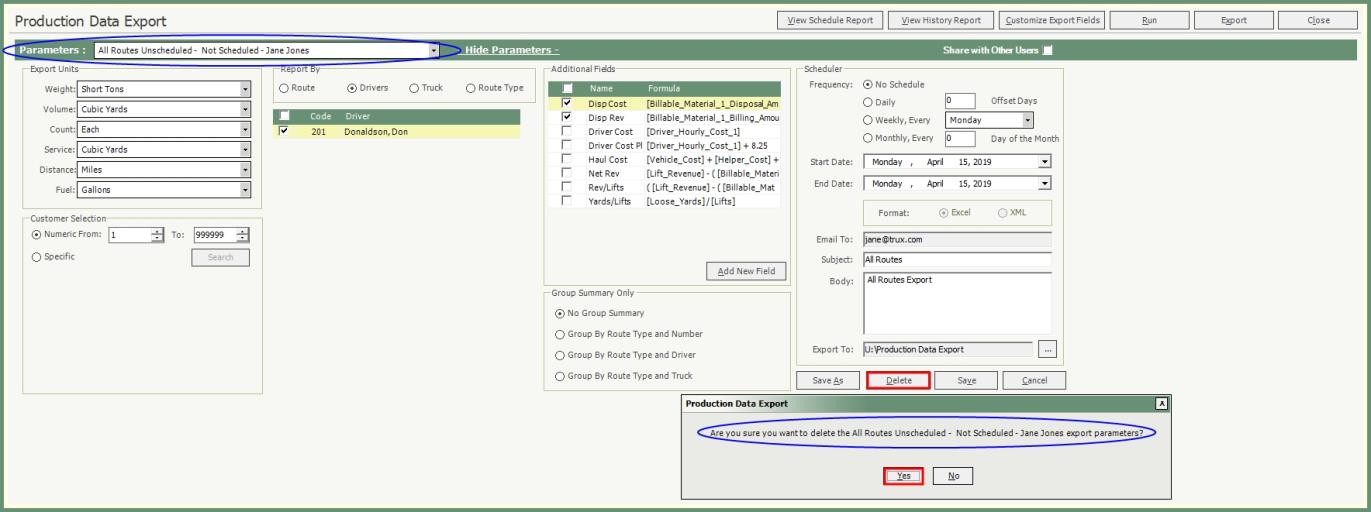
- Recall an existing Parameter from the drop down.
- Click Delete.
- Confirm delete message, click Yes.
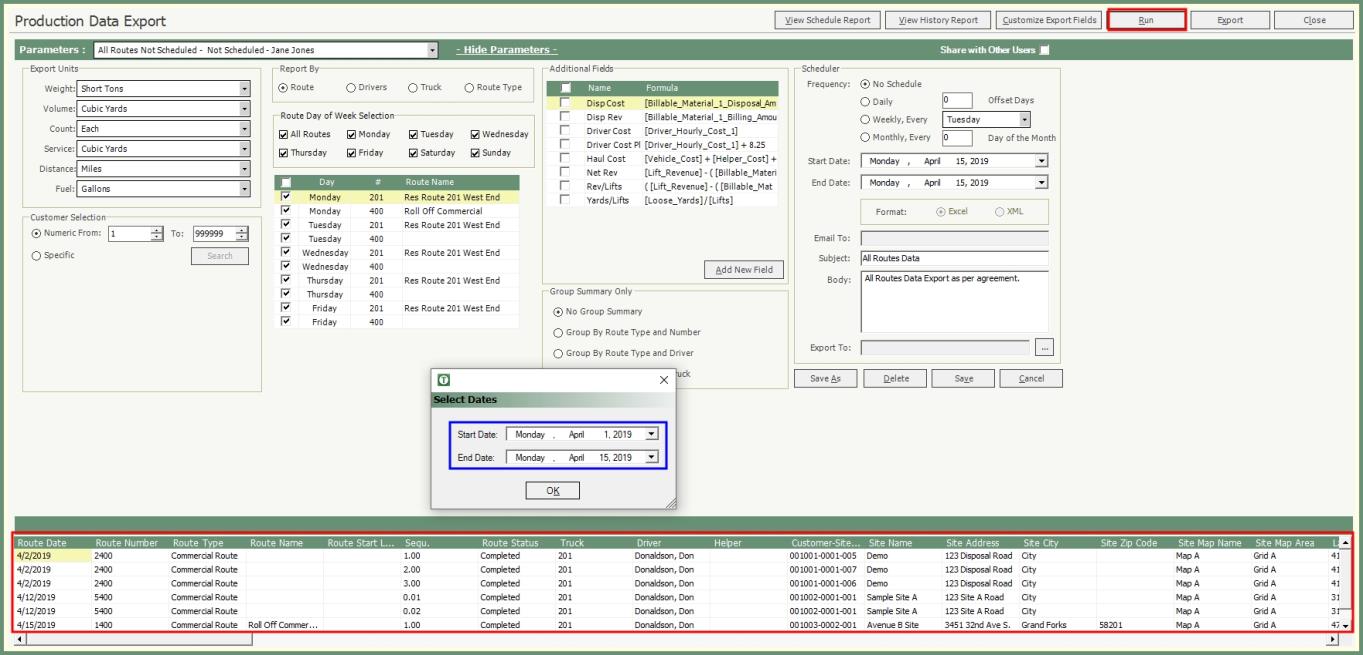
- Recall an existing Parameter from the drop down or enter new parameters.
- If entering new parameters, you will be prompted to save the parameters as a Parameter Set Name.
- Click Run.
- Select Start and End Dates. (Results are based upon Route Dates).
- Results will display in the grid.
- Click to remove the Parameter view and expand the Grid view.
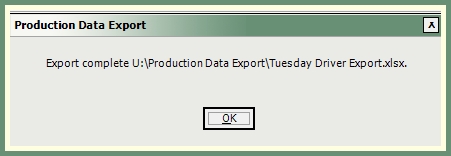
- Click Export to export the grid results.
- Select the directory and file name to export.
- .
Add New Field provides the ability to create a new additional field or modify an existing field.
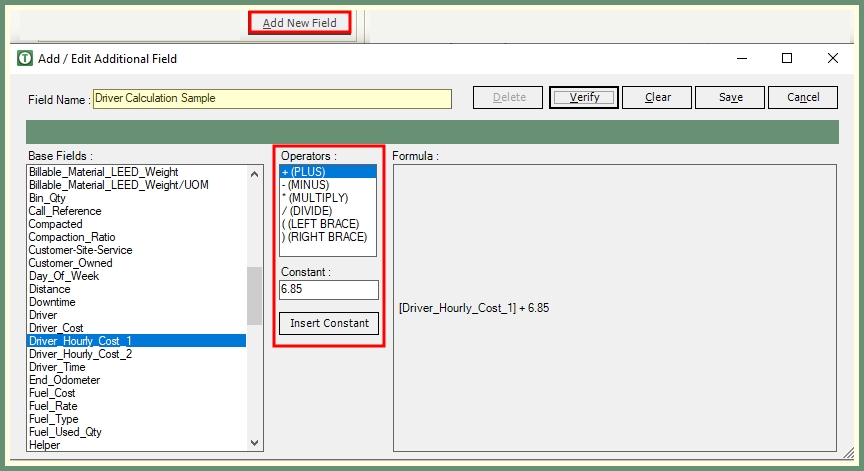
- Click Add New Field in the lower right corner of the Additional Fields parameters.
- Enter a unique Field Name.
- Select a Base Field.
- Select an Operator.
- Enter a Constant.
- Click Insert Constant.
- As the Formula is built, it will be added to the Formula section.
- Click Verify.
- If the Formula is accepted, the Save button will become available.
- Click Save.
- Select the added field from the Additional Fields grid.
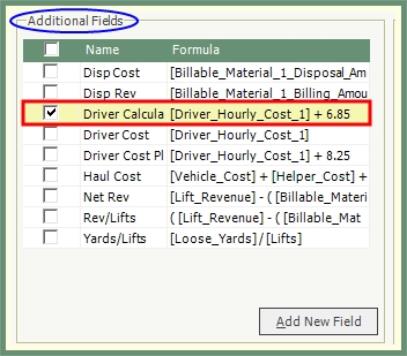
Modify or Delete Additional Field
An existing field within the Additional Field grid can be modified or deleted.
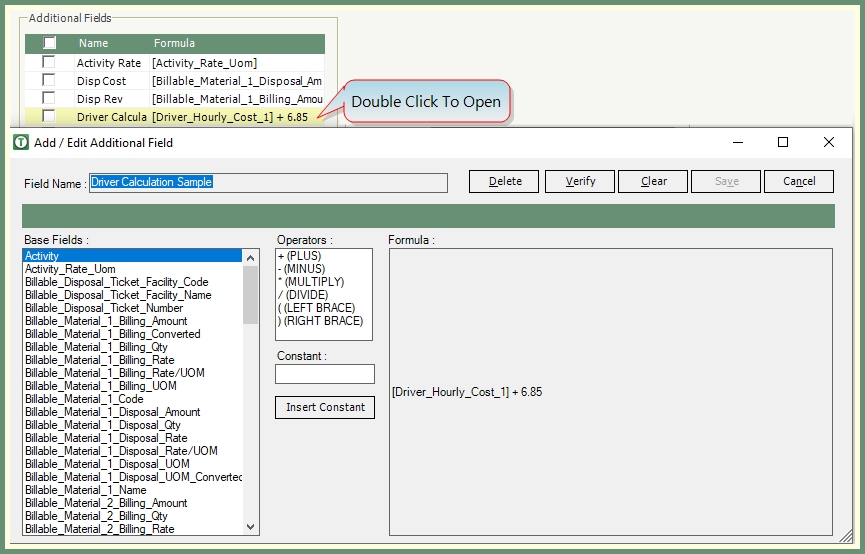
Modify
- Double Click to open an existing Additional Field in the grid.
- Click Clear to clear the existing Formula.
- Select Base Field and Operator.
- Enter Constant and Click Insert Constant.
- Verify Formula.
- Save.
Delete
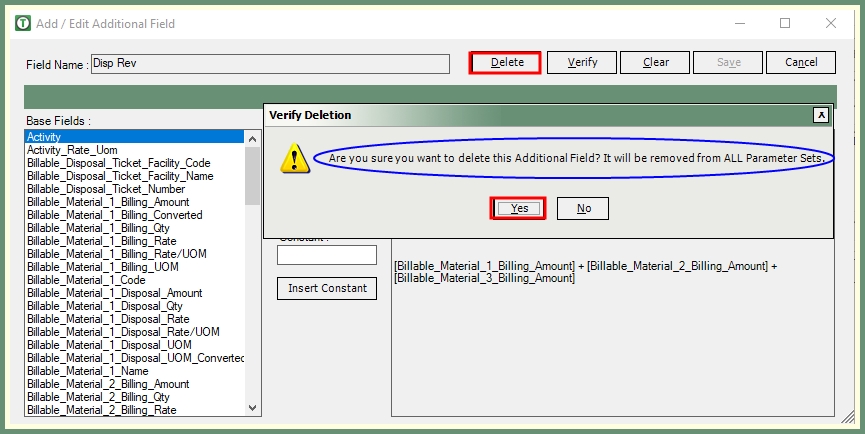
- Double Click to open an existing Additional Field in the grid.
- Click Delete.
- Verify Deletion.
- Click Yes to proceed with field deletion.
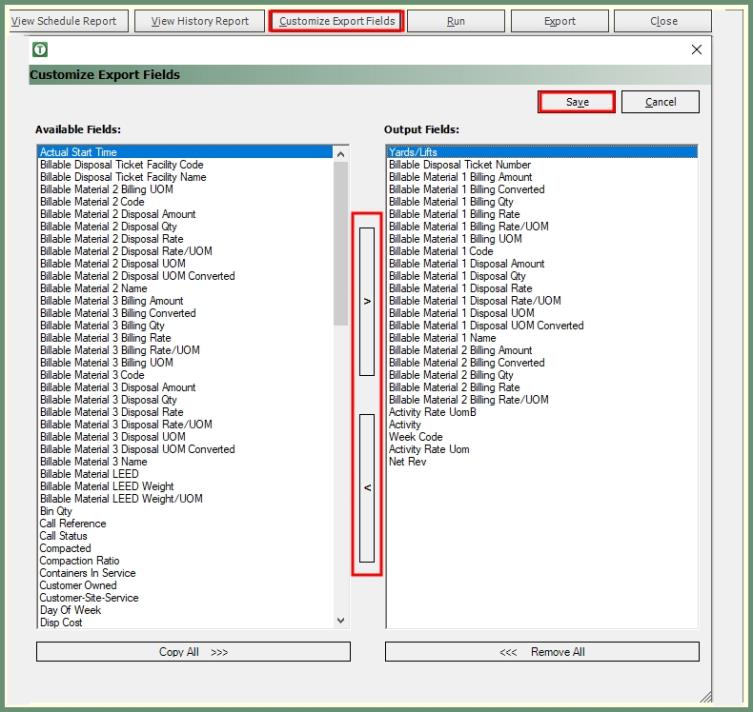
Fields to be included in the export can be defined based on the preference per Parameter Set. If Customized Fields are not selected, then all fields will be included.
- Recall a saved Parameter Set from the drop down.
- Click Customize Export Fields.
- The left column will contain the Available Fields based on the Report By parameter selection.
- To include Available Fields individually, highlight the field on the left and the arrow pointing right to move the field to the Output Field.
- To include All Available Fields and remove unwanted fields individually, Click Copy All.
- Remove fields from the Output Fields column by highlighting the field and clicking the arrow pointing right.
- Click Remove All to remove all output fields from the column.
- Save.
Reports all Parameter Sets with a summary of each parameter section setting.
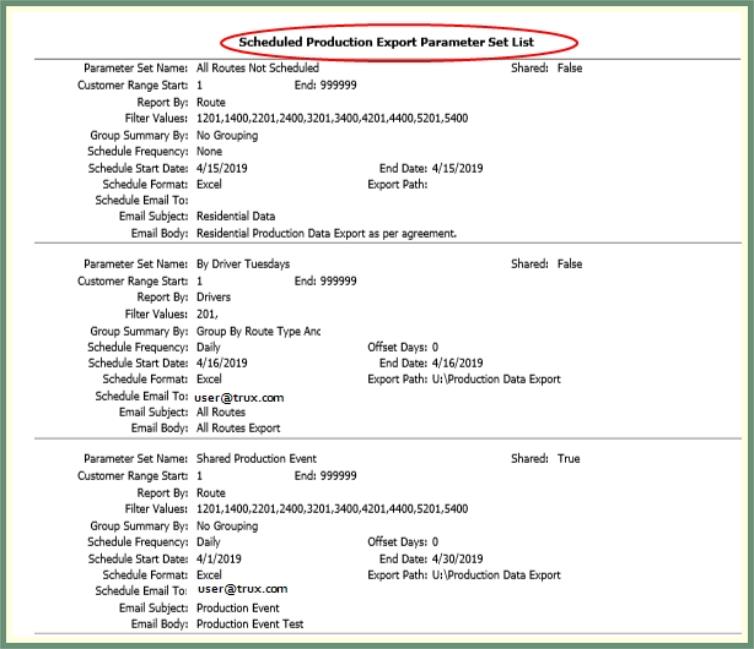
- Click View Schedule Report.
- Scheduled Production Export Parameter Set List will preview.
- Print or Export from preview.
Reports a list of Production Export History and indicates sent and received recipients by date and time and will indicate sent success or failures.
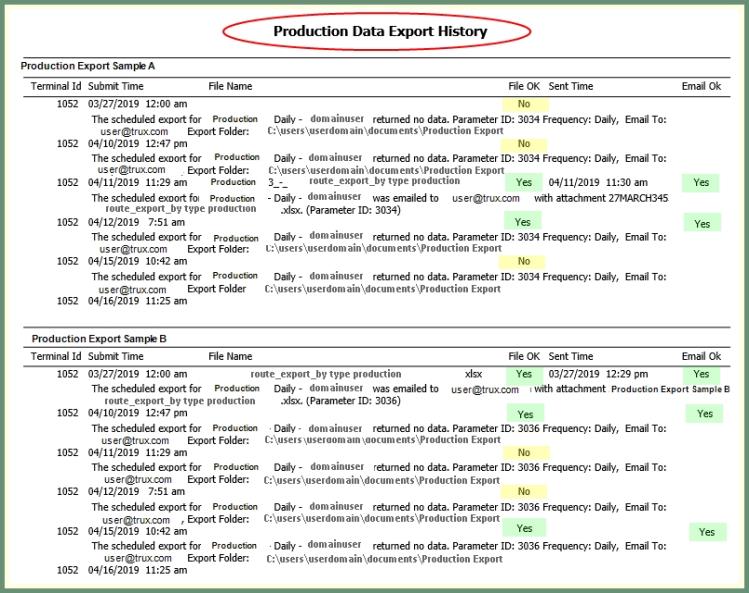
- Click View History Report.
- Production Data Export History report will preview.
- Print or Export from preview.
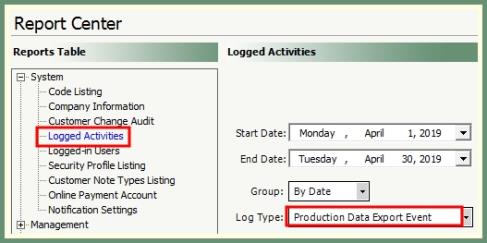
Navigate To: Report>Report Center>System>Logged Activities
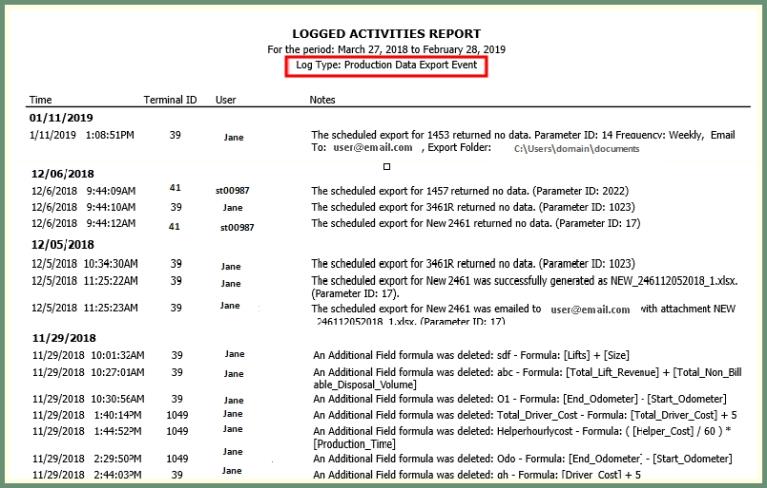
Each Production Data Export and Emailed Production Data will be logged in Logged Activities. The logged activities will include the date & time, user, parameter set, export folder, email to, success or failure as well as changes to existing parameter sets.
- Select Start and End Dates.
- Start & End Dates: Logging is stored by the date the export was run.
- Select preferred Group By from drop down or leave as default By Date.
- Select Log Type:
- Click Refresh.
- The grid will populate with results.
- Select an Output to generate the Logging Report.
- Preview, Print, Export or Email.


